
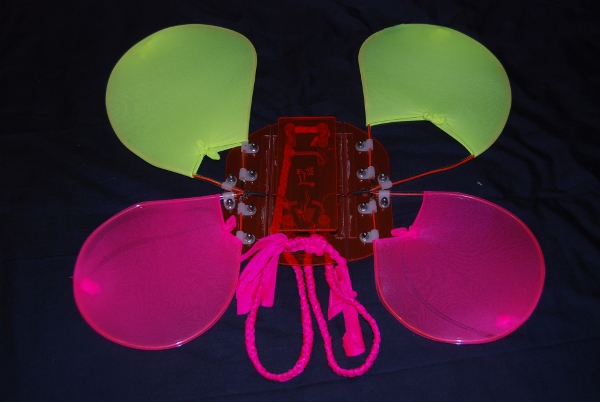
Wings lit up and being worn and closer detail
These were made for the Secret Garden Party Festival in 2009 and proved popular. They are largely made from acrylic sheet and tube, and use electroluminescent (EL) wire powered from a battery inverter for the lighting.
I
started off by sourcing the parts-
key components include:
Pink edge transmission acrylic- Trylon
Ltd (see links)
Clear acrylic tube- Trylon Ltd
Acrylic adhesive- Trylon Ltd
Hinges- Craftics parts from Tap
Plastics
Pink Lycra- Ebay
'Neon' flourescent tights- New Look
Electroluminescent wire and inverter-
Ebay
Miscellaneous parts from stock
I started by drawing out the wing shapes in CAD, primarily so it could be reproduced, but this could easily been done by hand. Thee upper and lower shapes were then transferred onto MDF and the shape cutout using a jigsaw. Care was needed in the design to ensure the curves were kept 'flowing'. After sanding, these templates were fitted to an offcut of blockboard. A small piece of MDF was fixed at one corner. This was arranged so that it would snugly hold the acrylic tube to the template.
Once the two templates had been created I was able to shape the tube to the wing shape by gently heating the tube with a hot air gun and bending round the former. The tube was held in place until it cooled, and then trimmed. This was repeated for the four wings of the two sizes.
The backboard was made in three pieces by cutting and drilling the edge transmission sheet, again based on a template laid out in CAD to make sure everything fitted. The two side pieces were attached to the central section using an acrylic hinge cemented in place. A small gap was left, held whilst curing with a couple of thin nails. The hinges are needed for two reasons- the acrylic tubes forming the wing shapes are fairly brittle and vulnerable being stuck out from the body, so the hinge adds a degree of protection if they are knocked. More importantly, the flap in the way wings should!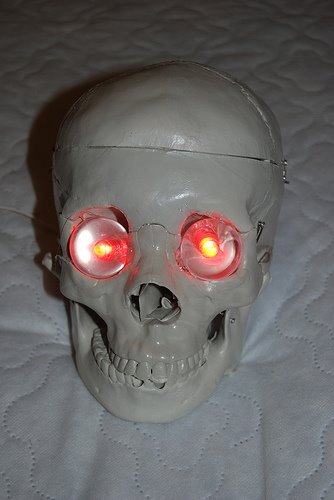
The
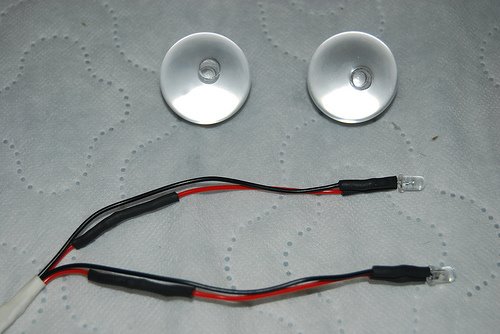
two 1" acrylic balls were drilled to about half their depth so that the
LEDs would just fit in. Two LEDs were then wired up with a 470 Ohm
resister and covered in heatshrink. The two wires were spliced together
and connected to a length of two core wire.
After testing, the LEDs were secured with dab of hot melt glue. The
balls were then secured to a 'Bucky' skull from 'The Anatomical Chart
Company'
Miniature Lights
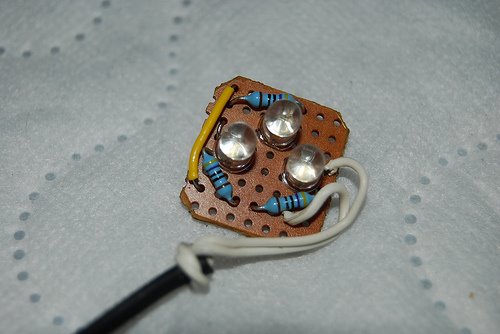
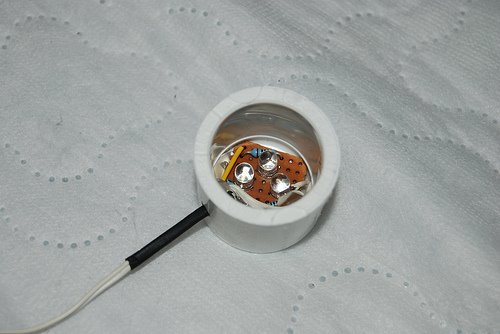
Prototype haunted house light unit. 3 Ultrabright LEDs are mounted to a small piece of strip board, along with 3 470 Ohm dropper resisters to be able to run from 12V. Connection is via a length of 2 core flexible 'bell wire' . The board is secured in a small PVC pipe end cap using hot melt adhesive. I will probably use bottle caps when I make a few more as they will be lighter and smaller. This one is green and acts as small spot.
Speakers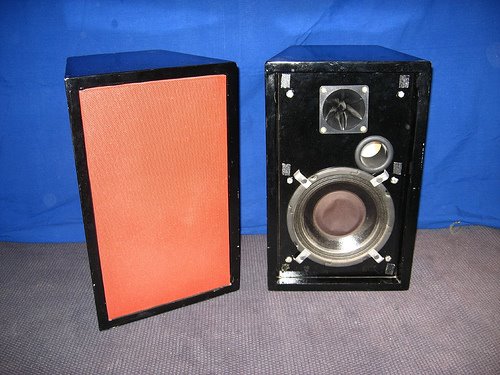
I built this pair of speakers about 13 years ago. They still form the main part of the hifi. Drivers are 10" PA ones from Terralec along with Piezo horns and are rated at 150W continuous. They are loud (and heavy)! They weren't cheap to build, but were much better value than what was available at the time. The enclosures are made from MDF completly to my own design.
I was really proud of these when I built them, they sound pretty good, with plenty of Bass.
For years I ran these on an Amp pulled out of a skip, until the volume pot finally died.